How to Build a Calculator App in Kotlin Using Android Studio
- zyrridian
- Tutorial , Android , Technology
- January 31, 2025
Table of Contents
In this tutorial, we’ll walk through the process of creating a simple yet functional calculator app using Kotlin in Android Studio. This project is beginner-friendly and will guide you step-by-step from setting up the project to building a fully working calculator. By the end, you’ll have an app that supports basic arithmetic operations like addition, subtraction, multiplication, and division.
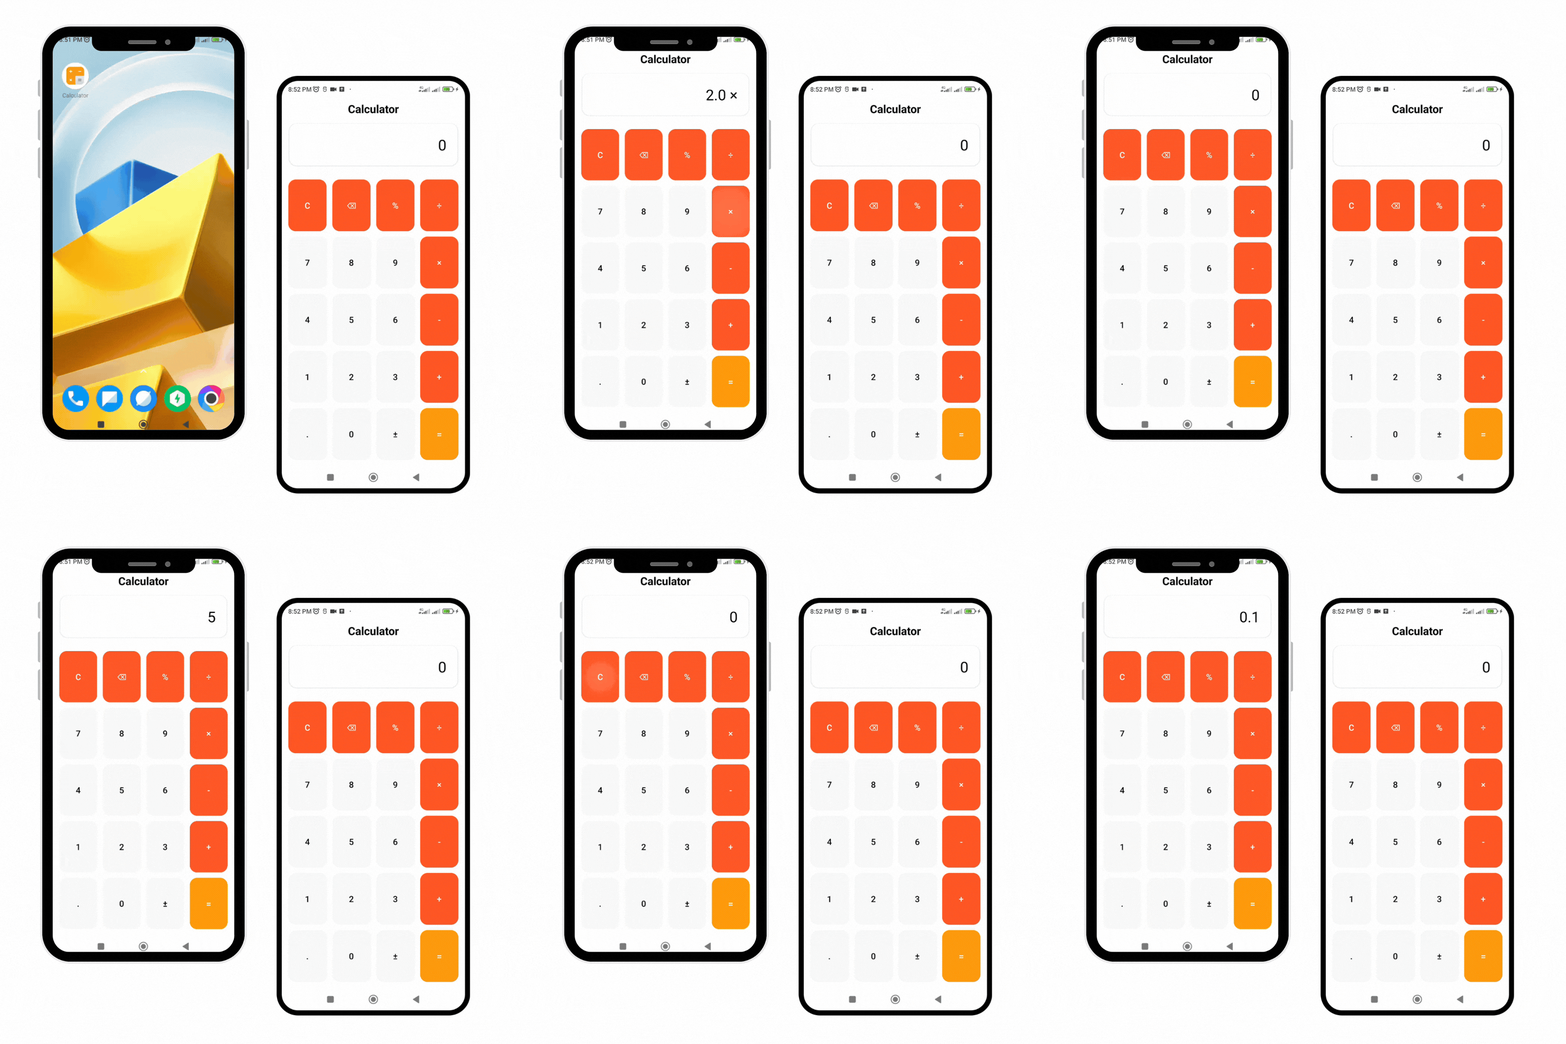
The final app will feature a clean and intuitive user interface, complete with a numeric keypad and a result screen. Users will be able to perform calculations seamlessly by interacting with the buttons. Below, you’ll find a GIF showcasing the app in action, demonstrating how users can input numbers and operations to calculate results.
Setting Up the Project
Before diving into the code, make sure you have the latest version of Android Studio installed. While it’s not mandatory, using the latest version ensures access to the newest features and better compatibility.
- Final Code: https://github.com/zyrridian/calculator-app
- Demo App: https://github.com/zyrridian/calculator-app/releases/tag/v1.0
Adding Styles to Themes
To create a consistent and visually appealing design, we’ll start by defining styles for our app. This will help us maintain a uniform look across buttons and layouts.
- Open your project tab in Android Studio.
- Navigate to
res > values > themes.xml.
You will see the default code like this:
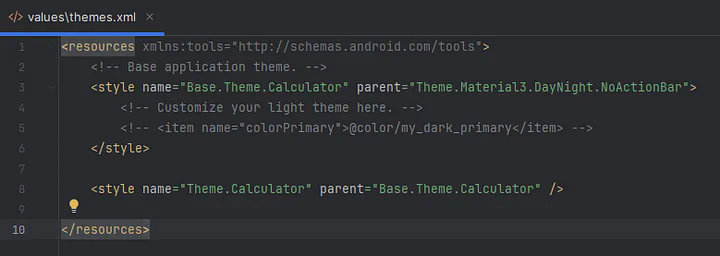
If you’re using a different version of Android Studio and see slightly different code, don’t worry — you don’t need to modify the default code extensively. Simply add the following line to set the background color to pure white:
<resources xmlns:tools="http://schemas.android.com/tools">
    <!-- Base application theme. -->
    <style name="Base.Theme.Calculator" parent="Theme.Material3.DayNight.NoActionBar">
        <!-- Customize your light theme here. -->
        <!-- <item name="colorPrimary">@color/my_dark_primary</item> -->
        <item name="android:colorBackground">@color/white</item>
    </style>

    <style name="Theme.Calculator" parent="Base.Theme.Calculator" />

</resources>
Creating Button Styles
Next, we’ll define three button styles:
CalculatorButton: For standard numeric buttons.CalculatorButtonOperation: For operation buttons (e.g., +, -, *, /).CalculatorButtonEqual: For the equal (=) button.

Each style specifies the button’s size, color, and appearance. These styles ensure that the buttons are visually distinct and consistent throughout the app.
Here’s how to define the styles in your themes.xml file. Make sure to add this code before the closing </resources> tag:
<resources xmlns:tools="http://schemas.android.com/tools">
    <!-- Base application theme -->
    <style name="Base.Theme.Calculator" parent="Theme.Material3.DayNight.NoActionBar">
        <!-- <item name="colorPrimary">@color/my_dark_primary</item> -->
        <item name="android:colorBackground">@color/white</item>
    </style>

    <style name="Theme.Calculator" parent="Base.Theme.Calculator" />

    <style name="CalculatorButton" parent="Widget.MaterialComponents.Button.TextButton">
        <item name="android:layout_width">0dp</item>
        <item name="android:layout_height">0dp</item>
        <item name="android:layout_rowWeight">1</item>
        <item name="android:layout_columnWeight">1</item>
        <item name="android:backgroundTint">#F8F8F8</item>
        <item name="android:textColor">#000000</item>
        <item name="android:textSize">18sp</item>
        <item name="cornerRadius">16dp</item>
        <item name="rippleColor">#FFE0B2</item>
    </style>

    <style name="CalculatorButtonOperation" parent="Widget.MaterialComponents.Button.TextButton">
        <item name="android:layout_width">0dp</item>
        <item name="android:layout_height">0dp</item>
        <item name="android:layout_rowWeight">1</item>
        <item name="android:layout_columnWeight">1</item>
        <item name="android:backgroundTint">#FF5722</item>
        <item name="android:textColor">#FFFFFF</item>
        <item name="android:textSize">18sp</item>
        <item name="cornerRadius">16dp</item>
        <item name="rippleColor">#FF8A65</item>
    </style>

    <style name="CalculatorButtonEqual" parent="Widget.MaterialComponents.Button.TextButton">
        <item name="android:layout_width">0dp</item>
        <item name="android:layout_height">0dp</item>
        <item name="android:layout_rowWeight">1</item>
        <item name="android:layout_columnWeight">1</item>
        <item name="android:backgroundTint">#FF9800</item>
        <item name="android:textColor">#FFFFFF</item>
        <item name="android:textSize">20sp</item>
        <item name="cornerRadius">16dp</item>
        <item name="rippleColor">#FFC947</item>
    </style>

</resources>
Note
If the code seems overwhelming at first, don’t worry! The key to mastering coding is to keep moving forward. We’ll explain the details of how these styles work once the app is functional.
Building the Layout
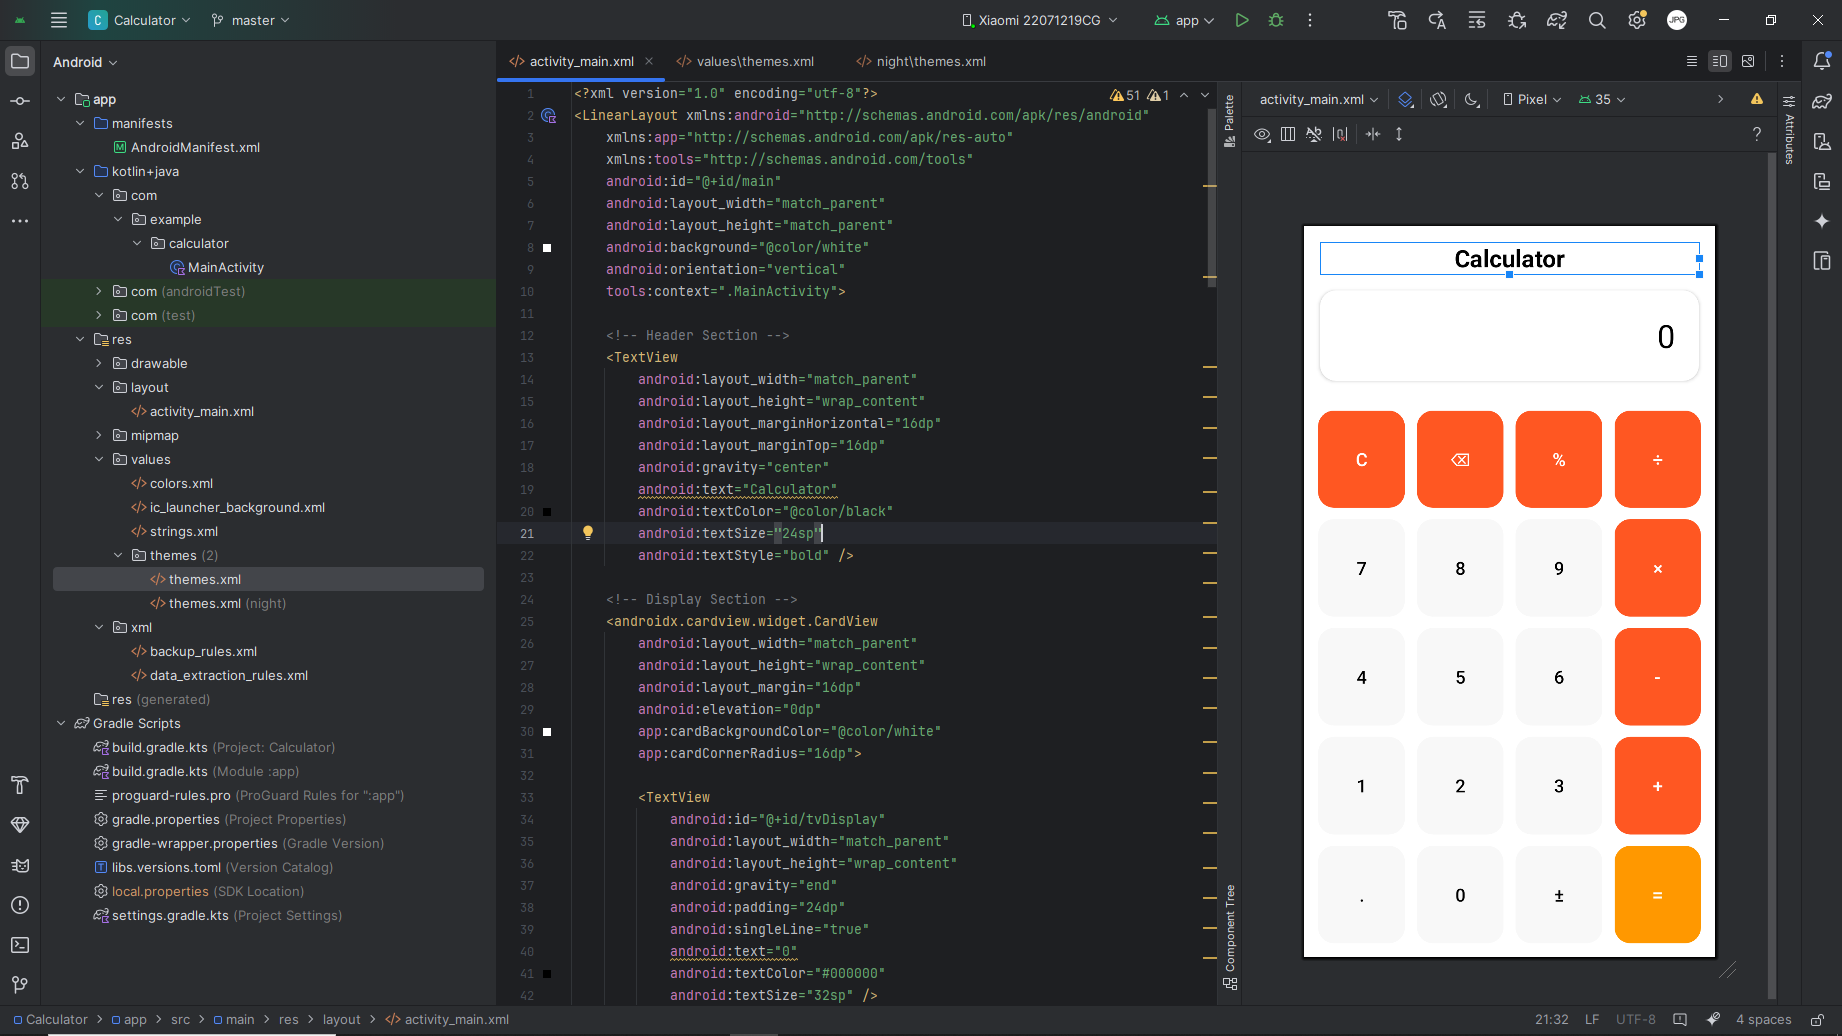
Now that we’ve defined our app’s styles, it’s time to design the layout. A well-structured layout is essential for creating an intuitive and user-friendly interface. In this section, we’ll build the basic structure of the calculator app, including the header and the display section.
Open the res > layout > activity_main.xml file in Android Studio. Switch to “Split” mode to view both the XML code and the visual editor simultaneously. This makes it easier to see how your changes affect the layout in real time.
Here’s the XML code for the initial layout:
<LinearLayout xmlns:android="http://schemas.android.com/apk/res/android"
    xmlns:app="http://schemas.android.com/apk/res-auto"
    xmlns:tools="http://schemas.android.com/tools"
    android:id="@+id/main"
    android:layout_width="match_parent"
    android:layout_height="match_parent"
    android:background="@color/white"
    android:orientation="vertical"
    tools:context=".MainActivity">

    <!-- Header Section -->
    <TextView
        android:layout_width="match_parent"
        android:layout_height="wrap_content"
        android:layout_marginHorizontal="16dp"
        android:layout_marginTop="16dp"
        android:gravity="center"
        android:text="Calculator"
        android:textColor="@color/black"
        android:textSize="24sp"
        android:textStyle="bold" />

    <!-- Display Section -->
    <androidx.cardview.widget.CardView
        android:layout_width="match_parent"
        android:layout_height="wrap_content"
        android:layout_margin="16dp"
        android:elevation="0dp"
        app:cardBackgroundColor="@color/white"
        app:cardCornerRadius="16dp">

        <TextView
            android:id="@+id/tvDisplay"
            android:layout_width="match_parent"
            android:layout_height="wrap_content"
            android:gravity="end"
            android:padding="24dp"
            android:singleLine="true"
            android:text="0"
            android:textColor="#000000"
            android:textSize="32sp" />

    </androidx.cardview.widget.CardView>

</LinearLayout>
Header Section
The header section is a simple TextView that displays the title of the app, “Calculator.” It’s centered horizontally and has a bold, 24sp font size for clear visibility. The margins ensure the title is appropriately spaced from the edges of the screen, giving the layout a clean and organized look.
Display Section
Below the header, we’ve added a CardView to create a visually distinct area for the calculator’s display. The CardView has a corner radius of 16dp, giving it a rounded appearance, and its background color matches the app’s white theme. Inside the CardView, a TextView is used to show the current calculation or result.
The TextView (tvDisplay) is configured to display text aligned to the end (right side for left-to-right languages) and has a larger font size (32sp) for easy readability. It also uses singleLine="true" to ensure the text doesn’t wrap to a new line, keeping the display neat and concise.
Adding the Button Grid
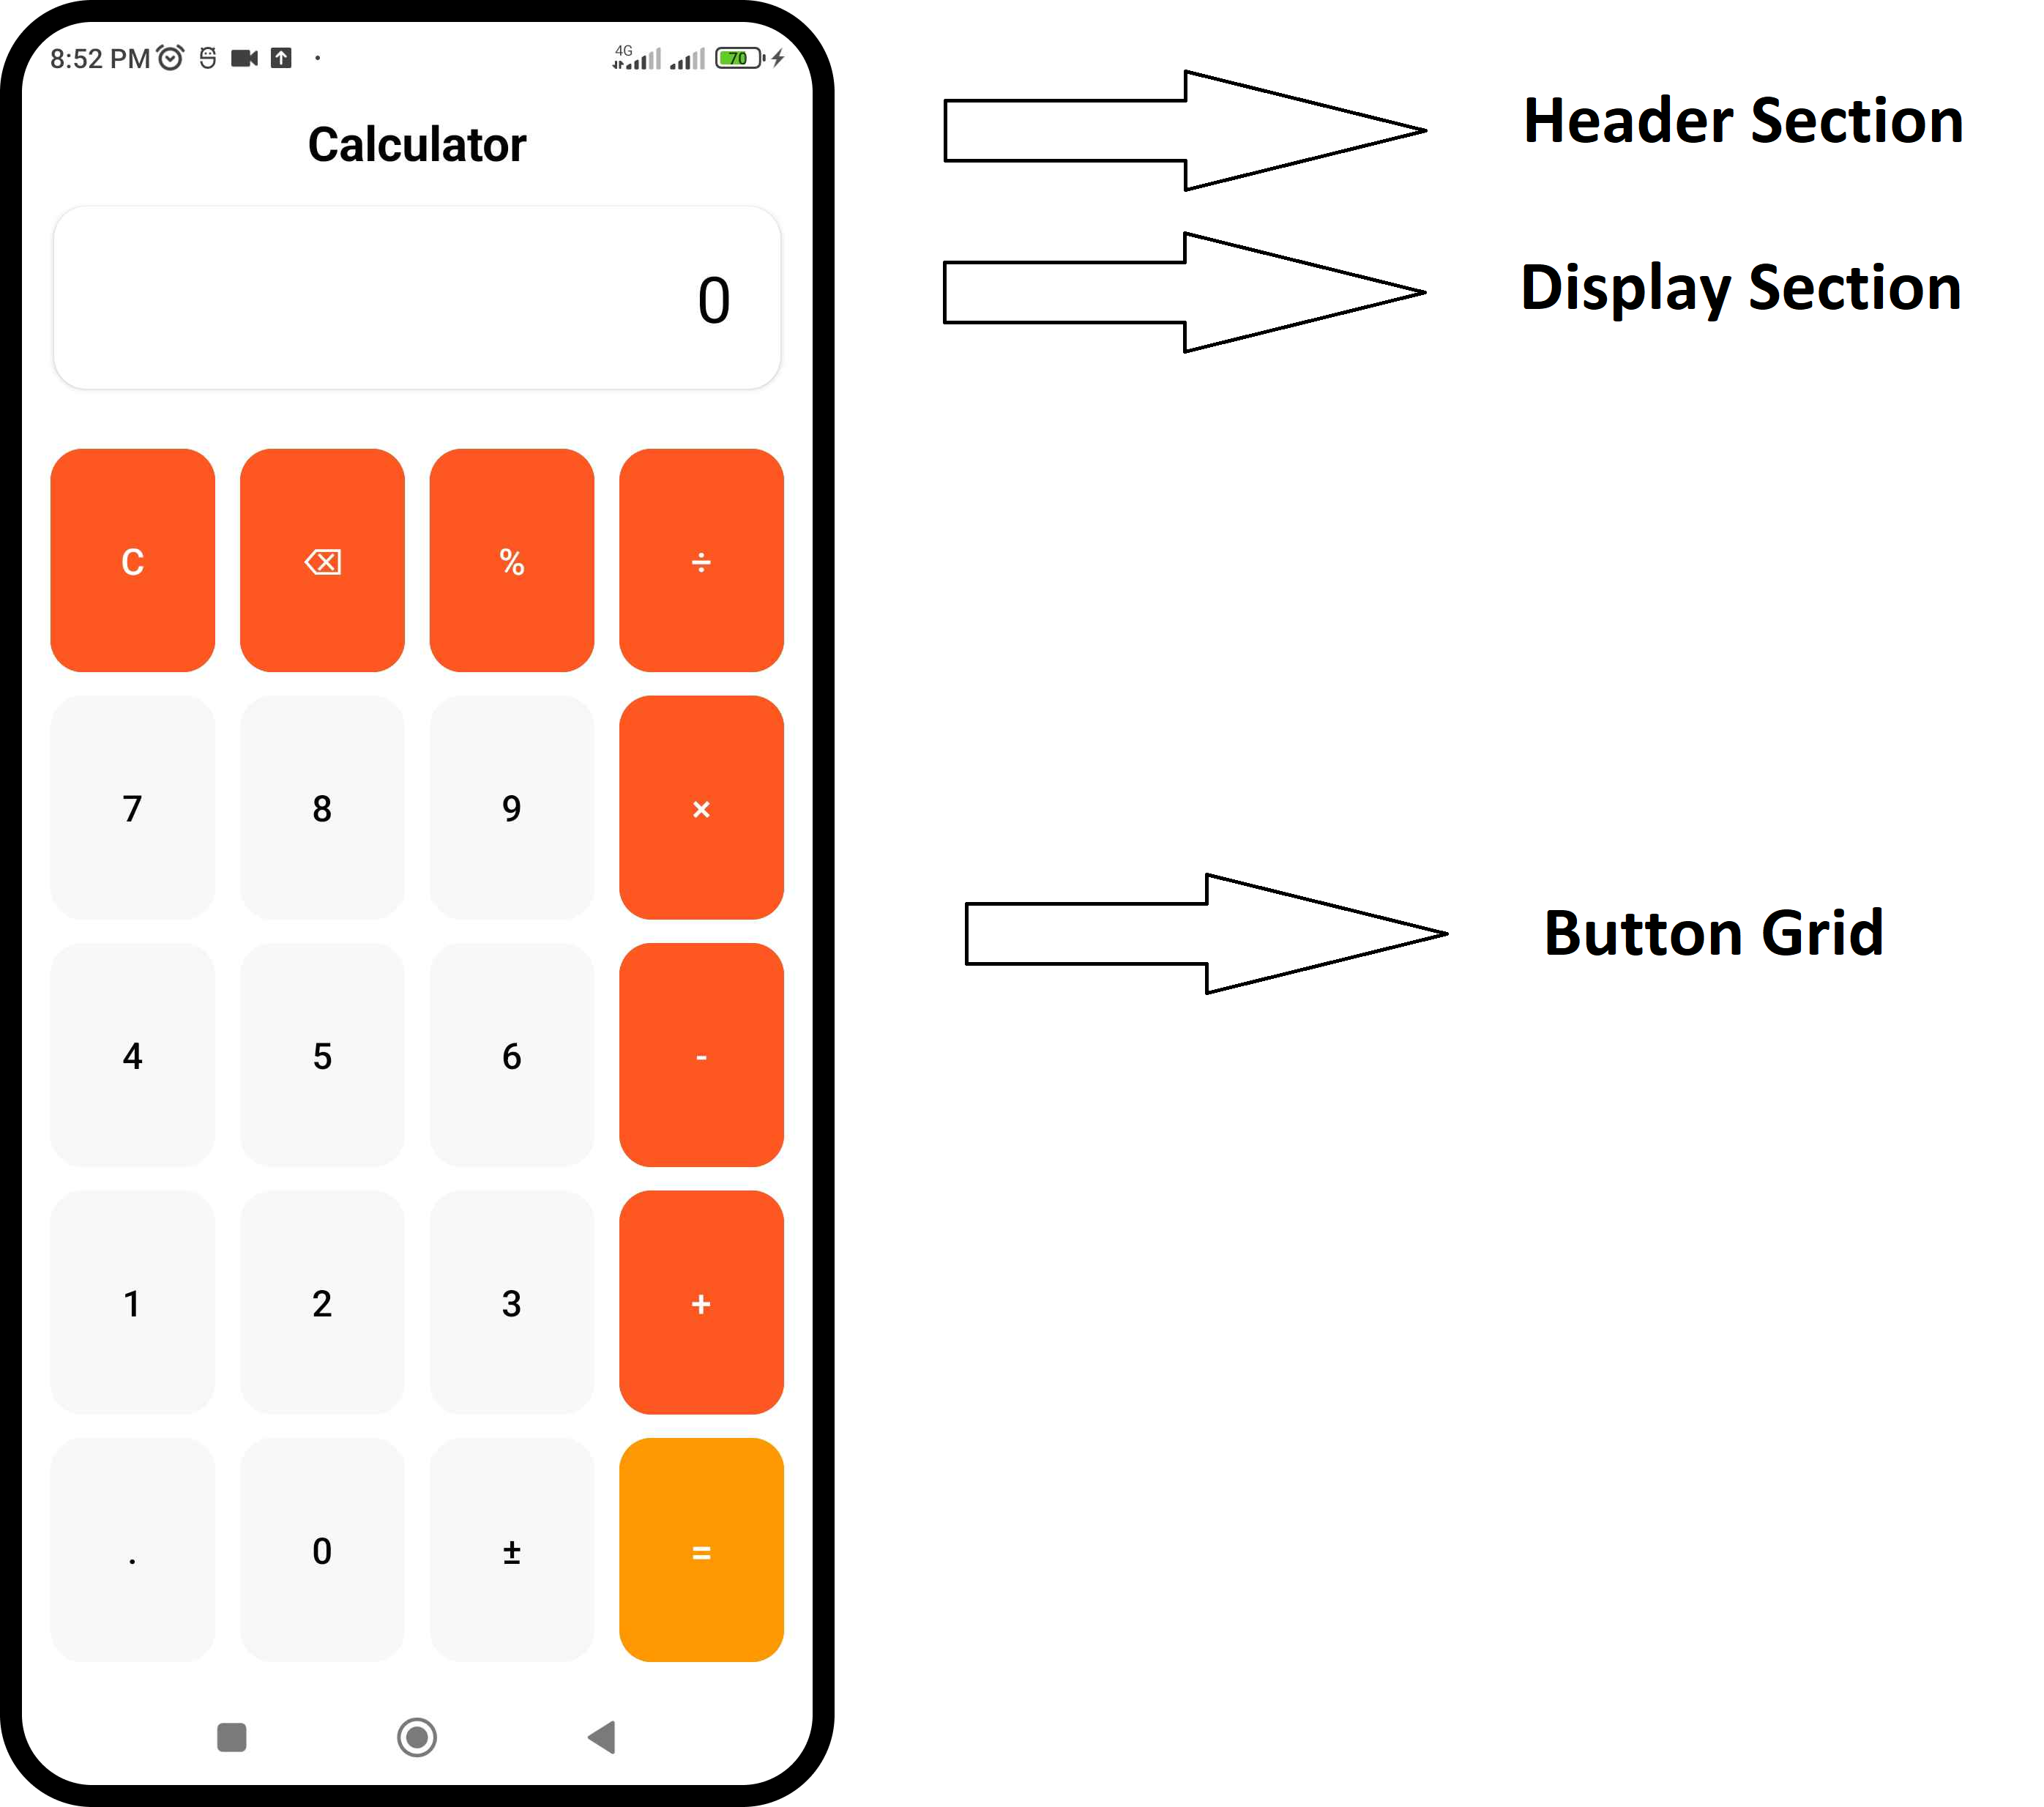
With the header and display sections in place, the next step is to add the button grid for numbers, operations, and the equal button. This grid will allow users to input numbers and perform calculations seamlessly. To achieve this, we’ll use a GridLayout to arrange the buttons in a structured and responsive manner.
Below is the updated XML code for the activity_main.xml file. Add the button grid section to your code in the appropriate position. For clarity, I’ve kept the existing code structure intact so you can easily see where the new section fits:
<?xml version="1.0" encoding="utf-8"?>
<LinearLayout xmlns:android="http://schemas.android.com/apk/res/android"
    xmlns:app="http://schemas.android.com/apk/res-auto"
    xmlns:tools="http://schemas.android.com/tools"
    android:id="@+id/main"
    android:layout_width="match_parent"
    android:layout_height="match_parent"
    android:background="@color/white"
    android:orientation="vertical"
    tools:context=".MainActivity">

    <!-- Header Section -->
    <TextView
        android:layout_width="match_parent"
        ... />

    <!-- Display Section -->
    <androidx.cardview.widget.CardView
        android:layout_width="match_parent"
        ... >

        <TextView
            android:id="@+id/tvDisplay"
            ... />

    </androidx.cardview.widget.CardView>

    <!-- Button Grid -->
    <GridLayout
        android:layout_width="match_parent"
        android:layout_height="0dp"
        android:layout_weight="1"
        android:columnCount="4"
        android:padding="8dp"
        android:rowCount="5">

        <!-- Row 1 -->
        <com.google.android.material.button.MaterialButton
            android:id="@+id/btnClear"
            style="@style/CalculatorButtonOperation"
            android:layout_marginStart="6dp"
            android:layout_marginEnd="6dp"
            android:text="C" />

        <com.google.android.material.button.MaterialButton
            android:id="@+id/btnBackspace"
            style="@style/CalculatorButtonOperation"
            android:layout_marginStart="6dp"
            android:layout_marginEnd="6dp"
            android:text="⌫" />

        <com.google.android.material.button.MaterialButton
            android:id="@+id/btnPercent"
            style="@style/CalculatorButtonOperation"
            android:layout_marginStart="6dp"
            android:layout_marginEnd="6dp"
            android:text="%" />

        <com.google.android.material.button.MaterialButton
            android:id="@+id/btnDivide"
            style="@style/CalculatorButtonOperation"
            android:layout_marginStart="6dp"
            android:layout_marginEnd="6dp"
            android:text="÷" />

        <!-- Row 2-->

    </GridLayout>

</LinearLayout>
Understanding the GridLayout
The GridLayout is configured to span the full width of the screen (match_parent) and has a height of 0dp. At first glance, this might seem counterintuitive-why set the height to 0dp? The reason lies in the layout_weight property. By setting layout_weight="1", the GridLayout will dynamically expand to fill the remaining vertical space in the parent LinearLayout. This ensures the button grid is properly sized and responsive.
We’ve also set the columnCount to 4 and rowCount to 5, creating a grid that can accommodate 20 buttons (4 columns × 5 rows). The padding of 8dp ensures the buttons are evenly spaced and visually appealing.
Adding Buttons to the Grid
Inside the GridLayout, we’ve added the first row of buttons: Clear (C), Backspace (⌫), Percent (%), and Divide (÷). These buttons use the MaterialButton component, which provides a modern and consistent design. Each button is styled using the CalculatorButtonOperation style we defined earlier.
- Margins: Each button has horizontal margins (
layout_marginStartandlayout_marginEnd) of6dpto create spacing between them. - IDs: Unique IDs like
btnClearandbtnBackspaceare assigned to each button, which will later be used to handle button clicks in the Kotlin code.
Tip
Experiment with Styles: Try removing the style attribute from one of the buttons to see how it affects the appearance. This will help you understand the importance of the styles we defined earlier.
Info
Row Comments: Notice the comment above the first set of buttons. Since we’ve set columnCount to 4, every four buttons will form a new row. Adding comments like this makes the code easier to read and maintain.
Next Steps
Now that the first row of buttons is in place, you can continue adding the remaining buttons for numbers, operations, and the equal button. Follow the same pattern, ensuring each row is clearly marked with a comment (e.g., <!-- Row 2 -->).
<!-- Row 2 -->
<com.google.android.material.button.MaterialButton
    android:id="@+id/btn7"
    style="@style/CalculatorButton"
    android:layout_marginStart="6dp"
    android:layout_marginEnd="6dp"
    android:text="7" />

<com.google.android.material.button.MaterialButton
    android:id="@+id/btn8"
    style="@style/CalculatorButton"
    android:layout_marginStart="6dp"
    android:layout_marginEnd="6dp"
    android:text="8" />

<com.google.android.material.button.MaterialButton
    android:id="@+id/btn9"
    style="@style/CalculatorButton"
    android:layout_marginStart="6dp"
    android:layout_marginEnd="6dp"
    android:text="9" />

<com.google.android.material.button.MaterialButton
    android:id="@+id/btnMultiply"
    style="@style/CalculatorButtonOperation"
    android:layout_marginStart="6dp"
    android:layout_marginEnd="6dp"
    android:text="×" />

<!-- Row 3 -->
<com.google.android.material.button.MaterialButton
    android:id="@+id/btn4"
    style="@style/CalculatorButton"
    android:layout_marginStart="6dp"
    android:layout_marginEnd="6dp"
    android:text="4" />

<com.google.android.material.button.MaterialButton
    android:id="@+id/btn5"
    style="@style/CalculatorButton"
    android:layout_marginStart="6dp"
    android:layout_marginEnd="6dp"
    android:text="5" />

<com.google.android.material.button.MaterialButton
    android:id="@+id/btn6"
    style="@style/CalculatorButton"
    android:layout_marginStart="6dp"
    android:layout_marginEnd="6dp"
    android:text="6" />

<com.google.android.material.button.MaterialButton
    android:id="@+id/btnMinus"
    style="@style/CalculatorButtonOperation"
    android:layout_marginStart="6dp"
    android:layout_marginEnd="6dp"
    android:text="-" />

<!-- Row 4 -->
<com.google.android.material.button.MaterialButton
    android:id="@+id/btn1"
    style="@style/CalculatorButton"
    android:layout_marginStart="6dp"
    android:layout_marginEnd="6dp"
    android:text="1" />

<com.google.android.material.button.MaterialButton
    android:id="@+id/btn2"
    style="@style/CalculatorButton"
    android:layout_marginStart="6dp"
    android:layout_marginEnd="6dp"
    android:text="2" />

<com.google.android.material.button.MaterialButton
    android:id="@+id/btn3"
    style="@style/CalculatorButton"
    android:layout_marginStart="6dp"
    android:layout_marginEnd="6dp"
    android:text="3" />

<com.google.android.material.button.MaterialButton
    android:id="@+id/btnPlus"
    style="@style/CalculatorButtonOperation"
    android:layout_marginStart="6dp"
    android:layout_marginEnd="6dp"
    android:text="+" />

<!-- Row 5 -->
<com.google.android.material.button.MaterialButton
    android:id="@+id/btnComma"
    style="@style/CalculatorButton"
    android:layout_marginStart="6dp"
    android:layout_marginEnd="6dp"
    android:text="." />

<com.google.android.material.button.MaterialButton
    android:id="@+id/btn0"
    style="@style/CalculatorButton"
    android:layout_marginStart="6dp"
    android:layout_marginEnd="6dp"
    android:text="0" />

<com.google.android.material.button.MaterialButton
    android:id="@+id/btnSignChange"
    style="@style/CalculatorButton"
    android:layout_marginStart="6dp"
    android:layout_marginEnd="6dp"
    android:text="±" />

<com.google.android.material.button.MaterialButton
    android:id="@+id/btnEqual"
    style="@style/CalculatorButtonEqual"
    android:layout_marginStart="6dp"
    android:layout_marginEnd="6dp"
    android:text="=" />
Once all buttons are added, the layout will be complete, and you’ll have a fully functional calculator interface.
Info
You can find the final code for activity_main.xml in the GitHub repository here.
Adding Functionality
Our app’s layout is complete, but when you click the buttons, nothing happens. Why? Because we’ve only built the user interface so far - we haven’t added any functionality to handle user interactions. To make the calculator work, we need to implement the logic in MainActivity.kt. Let’s dive into the code and bring our calculator to life.
Open your MainActivity.kt file. Here, we’ll start by declaring variables to store the calculator’s state and connecting the UI components from the XML layout to the Kotlin code. We’ll also set up click event listeners for each button to define what happens when a user interacts with them.
Here’s how the initial setup looks:
package com.example.calculator

import android.os.Bundle
import android.widget.Button
import android.widget.TextView
import androidx.activity.enableEdgeToEdge
import androidx.appcompat.app.AppCompatActivity
import androidx.core.view.ViewCompat
import androidx.core.view.WindowInsetsCompat
import com.google.android.material.button.MaterialButton

class MainActivity : AppCompatActivity() {

    private lateinit var tvDisplay: TextView
    private var currentInput = ""
    private var operator = ""
    private var lastOperator = ""
    private var result = 0.0
    private var isNewInput = false

    override fun onCreate(savedInstanceState: Bundle?) {
        super.onCreate(savedInstanceState)
        enableEdgeToEdge()
        setContentView(R.layout.activity_main)
        ViewCompat.setOnApplyWindowInsetsListener(findViewById(R.id.main)) { v, insets ->
            val systemBars = insets.getInsets(WindowInsetsCompat.Type.systemBars())
            v.setPadding(systemBars.left, systemBars.top, systemBars.right, systemBars.bottom)
            insets
        }

        tvDisplay = findViewById(R.id.tvDisplay)

        // Number buttons
        val numberButtons = listOf<MaterialButton>(
            findViewById(R.id.btn0),
            findViewById(R.id.btn1),
            findViewById(R.id.btn2),
            findViewById(R.id.btn3),
            findViewById(R.id.btn4),
            findViewById(R.id.btn5),
            findViewById(R.id.btn6),
            findViewById(R.id.btn7),
            findViewById(R.id.btn8),
            findViewById(R.id.btn9)
        )

        numberButtons.forEach { button ->
            button.setOnClickListener { appendToDisplay(button.text.toString()) }
        }

        // Operation buttons
        findViewById<MaterialButton>(R.id.btnPlus).setOnClickListener { setOperator("+") }
        findViewById<MaterialButton>(R.id.btnMinus).setOnClickListener { setOperator("-") }
        findViewById<MaterialButton>(R.id.btnMultiply).setOnClickListener { setOperator("×") }
        findViewById<MaterialButton>(R.id.btnDivide).setOnClickListener { setOperator("÷") }
        findViewById<MaterialButton>(R.id.btnPercent).setOnClickListener { calculatePercentage() }
        findViewById<MaterialButton>(R.id.btnSignChange).setOnClickListener { toggleSign() }

        // Clear and backspace
        findViewById<MaterialButton>(R.id.btnClear).setOnClickListener { clearDisplay() }
        findViewById<MaterialButton>(R.id.btnBackspace).setOnClickListener { backspace() }

        // Decimal and equals
        findViewById<MaterialButton>(R.id.btnComma).setOnClickListener { appendToDisplay(".") }
        findViewById<MaterialButton>(R.id.btnEqual).setOnClickListener { calculateResult() }
    }

}
Variables:
tvDisplay: ThisTextViewwill show the current input or result.currentInput: Stores the user’s input as a string. operator andlastOperator: Track the current and previous arithmetic operations.result: Stores the calculated result.isNewInput: A flag to determine if the user is starting a new input after an operation.
Connecting UI Components:
- We use
findViewByIdto connect each button from the XML layout to the Kotlin code. - For number buttons, we loop through them using
forEachand set a click listener to append the button’s text to the display. - Operation buttons (
+,-,×,÷), special functions (%, sign change), and utility buttons (C,⌫,.,=) are assigned their respective click listeners.
Next Step: Creating Functions for Click Listeners
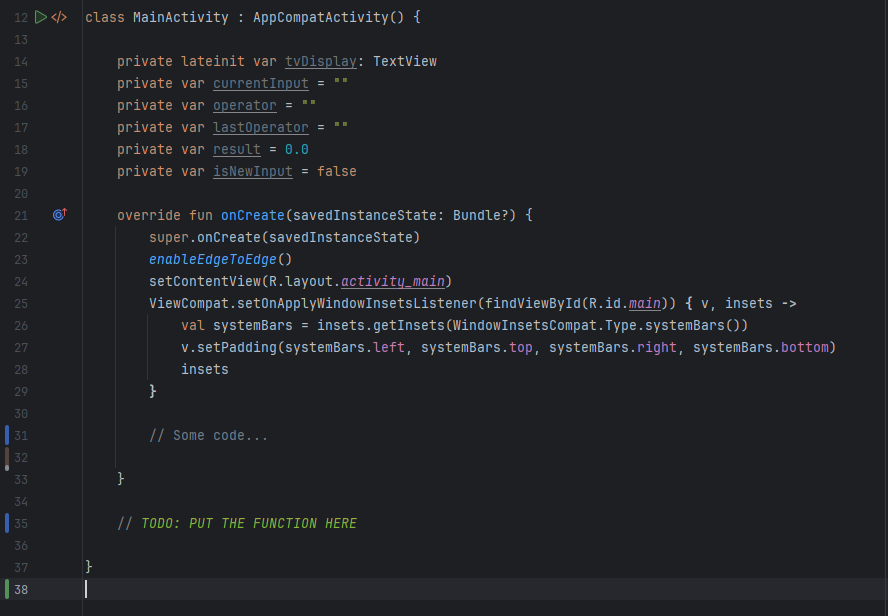
Now that we’ve set up the click listeners, we need to define the functions that handle these interactions. These functions will manage input, perform calculations, and update the display. Make sure to place these functions inside the MainActivity class, after the onCreate() method, to avoid errors.
Input Handling Function
Let’s start with the appendToDisplay() function, which handles user input:
private fun appendToDisplay(value: String) {
    if (isNewInput) {
        currentInput = ""
        isNewInput = false
    }
    if (currentInput == "0" && value != ".") {
        currentInput = value
    } else {
        currentInput += value
    }
    updateDisplay(currentInput)
}
This function checks if the user is starting a new input (isNewInput). If so, it clears the currentInput string. It also ensures that leading zeros are handled correctly and appends the new value to the input. Finally, it calls the updateDisplay() function to refresh the display with the updated input.
The updateDisplay() function is responsible for showing the current input or result on the screen. However, we haven’t defined it yet. Alongside this, we’ll also create utility functions for clearing the display, deleting the last character, and performing other operations.
Utility Functions
Now that we’ve set up the basic input handling, let’s implement the utility functions that will help manage the calculator’s state and user interactions. These functions include clearing the display, handling backspace, and updating the display with new values.
Here’s the code for the utility functions:
private fun clearDisplay() {
    currentInput = ""
    operator = ""
    result = 0.0
    updateDisplay("0")
}

private fun backspace() {
    if (currentInput.isNotEmpty()) {
        currentInput = currentInput.dropLast(1)
        updateDisplay(if (currentInput.isEmpty()) "0" else currentInput)
    }
}

private fun updateDisplay(value: String) {
    tvDisplay.text = value
}
clearDisplay()
The clearDisplay() function resets the calculator to its initial state. It clears the currentInput string, resets the operator and result variables, and updates the display to show “0”. This function is typically called when the user presses the “C” (Clear) button, ensuring that all previous inputs and calculations are removed.
backspace()
While the backspace() function might seem similar to clearDisplay(), its logic is quite different. This function handles the deletion of the last character in the currentInput string.
- Check for Empty Input: First, it checks if
currentInputis empty. If it is, the function does nothing because there’s nothing to delete. - Remove Last Character: If
currentInputis not empty, it uses Kotlin’s built-indropLast()function to remove the last character from the string. This eliminates the need for manual string manipulation. - Update Display: After modifying
currentInput, the function callsupdateDisplay()to refresh the screen. IfcurrentInputbecomes empty after deletion, the display is updated to show “0”. Otherwise, it shows the updatedcurrentInput.
updateDisplay()
The updateDisplay() function is a simple yet essential utility that updates the calculator’s display with the provided value.
- Parameter: It takes a
valueparameter of typeString, which represents the text to be displayed. - Functionality: It sets the
textproperty oftvDisplay(theTextViewused for the calculator’s display) to the provided value. This function is called whenever the display needs to be refreshed, such as after appending a number, clearing the display, or deleting a character.
Operator Handling Function
Next, we’ll add two functions to handle mathematical operators and calculate intermediate results when operations are chained. For example, when a user inputs 2 + 3 - 1, the calculator needs to compute 2 + 3 before handling the - 1.
Here’s the code for these functions:
private fun setOperator(op: String) {
    if (currentInput.isNotEmpty()) {
        if (operator.isNotEmpty()) {
            calculateIntermediateResult()
        } else {
            result = currentInput.toDouble()
        }
        operator = op
        lastOperator = operator
        currentInput = ""
        isNewInput = true
        updateDisplay("$result $operator")
    }
}

private fun calculateIntermediateResult() {
    if (operator.isNotEmpty() && currentInput.isNotEmpty()) {
        val secondOperand = currentInput.toDouble()
        result = when (operator) {
            "+" -> result + secondOperand
            "-" -> result - secondOperand
            "×" -> result * secondOperand
            "÷" -> if (secondOperand != 0.0) result / secondOperand else Double.NaN
            else -> result
        }
        operator = ""
    }
}
setOperator() Function
The setOperator() function is responsible for setting the current operator and preparing the calculator for the next input. Here’s how it works:
- If there’s already an operator in use, it calls
calculateIntermediateResult()to compute the result of the previous operation. - If no operator is set, it stores the current input as the first operand in the
resultvariable. - It then updates the
operatorandlastOperatorvariables, clears thecurrentInput, and setsisNewInputtotrueto indicate a new input is expected. - Finally, it updates the display to show the current result and the new operator.
calculateIntermediateResult() Function
The calculateIntermediateResult() function handles the actual computation when operations are chained. Here’s the breakdown:
- It checks if both an operator and a second operand (
currentInput) are available. - Using a
whenexpression, it performs the appropriate calculation based on the operator (+,-,×,÷). - For division, it ensures the second operand isn’t zero to avoid errors, returning
Double.NaN(Not a Number) if division by zero occurs. - After computing the result, it clears the
operatorvariable to prepare for the next operation.
Computation Functions
Finally, we’ll add three more functions to handle the final computations: calculating the result when the equal sign (=) is pressed, calculating percentages, and toggling the sign (positive/negative) of the current input.
private fun calculateResult() {
    if (currentInput.isNotEmpty()) {
        calculateIntermediateResult()
        currentInput = result.toString()
        operator = ""
        updateDisplay(currentInput)
    }
}

private fun calculatePercentage() {
    if (currentInput.isNotEmpty()) {
        currentInput = (currentInput.toDouble() / 100).toString()
        updateDisplay(currentInput)
    }
}

private fun toggleSign() {
    if (currentInput.isNotEmpty()) {
        currentInput = if (currentInput.startsWith("-")) {
            currentInput.substring(1)
        } else {
            "-$currentInput"
        }
        updateDisplay(currentInput)
    }
}
The calculateResult() function finalizes computations when the user clicks “=” by calling calculateIntermediateResult(), updating currentInput with the result, clearing the operator, and refreshing the display. Similarly, the calculatePercentage() function converts currentInput into a percentage by dividing it by 100 and updating the display accordingly.
The toggleSign() function switches the sign of currentInput, making positive numbers negative and vice versa. If the input starts with “-”, it removes the sign; otherwise, it adds one. The display is then updated to reflect the change.
Testing the App
That should be enough to make the calculator fully functional! Before running the app, double-check your code for any errors or typos. Once everything looks good, you can test the app on an emulator or a physical device to ensure all buttons and operations work as expected.
Info
For your reference, you can find the full code of MainActivity.kt in this GitHub repository.
Final Touch
When you run the app, it will work! Congratulations! However, there are some issues that we can fix. First, let’s address the orientation. When you change the display to landscape mode, the UI will look broken or misaligned, which is not ideal.
We can fix this by creating a responsive layout for specific screen sizes, but that would take time and make the codelab too complicated!

Because of that, let’s implement a simple trick instead. We will prevent our app from rotating into landscape mode, so it will always remain in portrait orientation. To do this, go to the AndroidManifest.xml file and modify the <activity> tag by adding the android:screenOrientation="portrait" attribute.
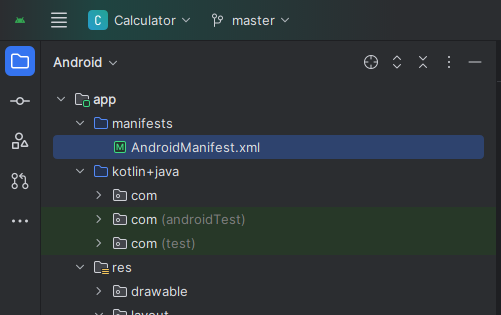
Here’s how the updated AndroidManifest.xml should look:
<?xml version="1.0" encoding="utf-8"?>
<manifest xmlns:android="http://schemas.android.com/apk/res/android"
    xmlns:tools="http://schemas.android.com/tools">

    <application
        android:allowBackup="true"
        android:dataExtractionRules="@xml/data_extraction_rules"
        android:fullBackupContent="@xml/backup_rules"
        android:icon="@mipmap/ic_launcher"
        android:label="@string/app_name"
        android:roundIcon="@mipmap/ic_launcher_round"
        android:supportsRtl="true"
        android:theme="@style/Theme.Calculator"
        tools:targetApi="31">
        <activity
            android:name=".MainActivity"
            android:exported="true"
            android:screenOrientation="portrait">
            <intent-filter>
                <action android:name="android.intent.action.MAIN" />

                <category android:name="android.intent.category.LAUNCHER" />
            </intent-filter>
        </activity>
    </application>

</manifest>
We’re almost done! To make things more polished and visually appealing, let’s change the app logo so that it doesn’t look boring.
Info
I’ve prepared a logo for you, which you can download from this link: Download Calculator Logo.
Follow these steps to update the logo:
- Right-click on the
drawablefolder in your project, then click on New > Image Asset. - In the Path field, click the folder icon and choose the image you downloaded earlier.
- Set the Resize value to 50%.
- Next, we’ll change the background. Click on the Background Layer, change the Asset Type to Color, and set the color to #FFFFFF (white).
- Once done, click Next and then Finish.
Now, run the app and voilà! Your app should look much better with the new logo and fixed orientation. Great job!

